Tutorial: Create a Sunburst Project
- Read time: 2 minutes
- Written by: CraftersCompanion
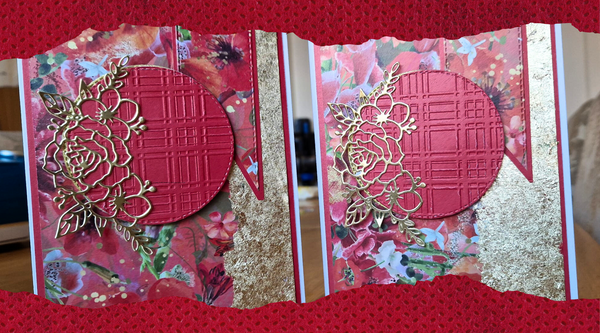
 Have you ever wondered how you can create this fabulous sunburst effect on your projects? Jane shows you just how easy it really is in her tutorial below! Have lots of crafty fun trying out this technique!
Crafter’s Companion Supplies:


Step 1: You will need to cut the following:
A 5″ x 5″ sqaure card base
A mat layer 4.75″ x 4.75″
A white layer 4.5″ x 4.5″
A stamped sentiment cut with the circle and scallop circle dies

Step 2: Cut your papers 4″ x 2″, 3 of each paper. (Jane used 4 different papers – you can use more or less depending on the look you want) and cut each rectangle across diagonal from top right corner to bottom left. If you have a pattern with “direction” you may need to cut more to keep the pattern going the correct way.

Step 3: Cover the 4.5″ x 4.5″ white square with Stick it on one side and begin layering the triangle of paper alternating the patterns from the centre of the card. Keep the right angle corners pointing the same way to ensure the pieces fit correctly.

Step 4: Continue until all the white card is covered.

Step 5: This is how it will look from the back

Step 6: Trim the edges of the papers off. The centre doesn’t matter if a little messy as this will be covered.

Step 7: Add your sentiment to the centre colouring the bee with Spectrum Noir Markers GB5 and the banner with PL1. Adhere the layers together and finish with gem strips around the edge and gems on the scallops.
Have fun using this sunburst technique on your projects, the possibilities are endless! This would look amazing if you altering a notebook or journal!
We would love to see what you make! Share your projects and cards with us on our Facebook page, tag us on Instagram (#crafterscompanion), on Pinterest (@CraftersCompUK) or on Twitter (@CraftersCompUK)!