How to: Quilt a cute tote bag with Threaders new Quilting Stencils
- Read time: 4 minutes
- Written by: CraftersCompanion
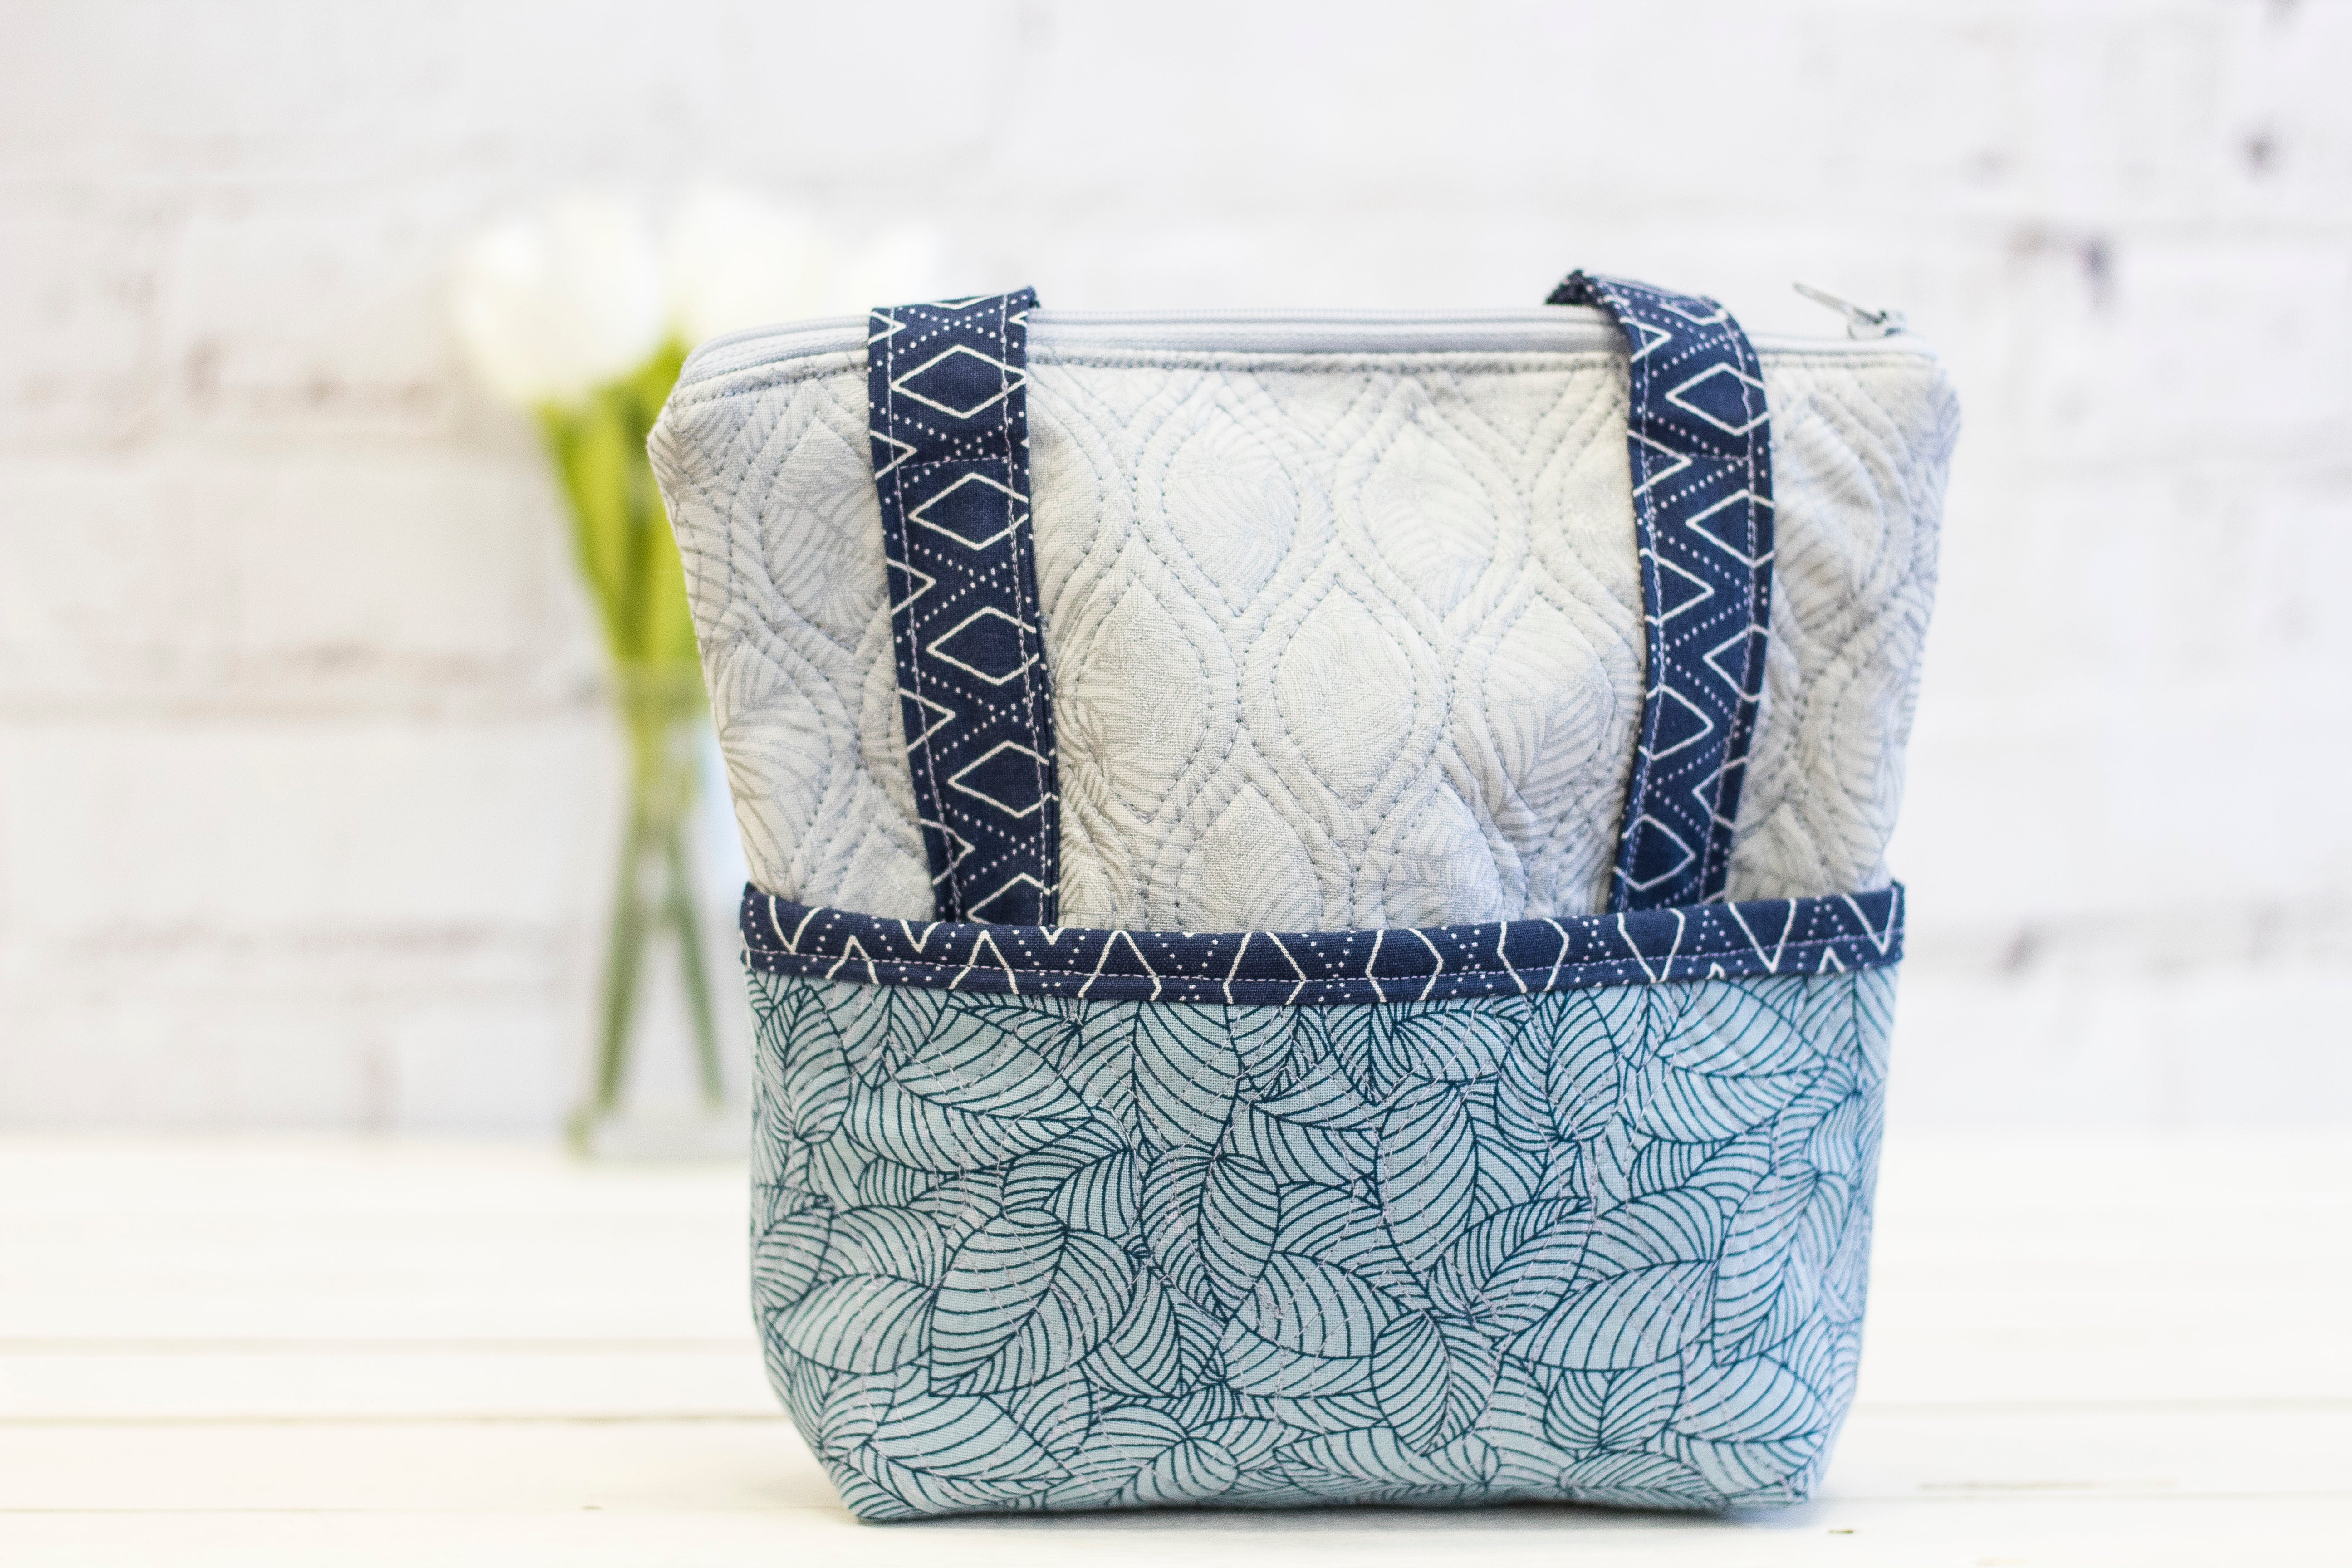
Want to learn how to make this really sweet tote bag using your favourite Threaders fabric and our brand new Quilting Stencils? You’ve come to the right place!
Follow the steps below to see how you can easily transfer lovely patterns onto your fabric and quilt with ease! Our stencils are resuable and can be used for hand or machine quilting!
What you’ll need:
1 FQ fusible medium weight interfacing
Thread
Basic sewing kit
Directions:
Step 1: Cut out your fabrics as required
-Squares of outer fabric: Cut two- 10“ x 10”
-Outer pockets: Cut four- 10“ x 6”
-Lining: Cut two- 10“ x 10”
-Fusible Fleece: Cut two- 10“ x 10”
-Handles: Cut two- 30” x 3”
-Pocket Binding: Cut two- 11” x 2.5”
-Pocket Interfacing: Cut two- 10” x 6”
Step 2:
Iron the 10” squares of fusible fleece to the wrong side of both pieces of outer fabric. Spray a light coating of stick and spray onto the back of your quilting stencil, this will help it stay in place while you trace your design with your Threaders pen. If you are using a repeating design move your stencil and match up the lines to ensure your design covers the whole 10” square.
Step 3:
Drop the feed dogs on your machine and attach the darning/embroidery foot. Carefully use free motion embroidery to sew over all the drawn stencil lines. Repeat this process on the remaining outer square. The quilting can be done by hand, if you prefer, rather than using your machine. Iron away any pen marks still visible.
Step 4:
Iron the two pieces of fusible interfacing to the back of the outer pocket pieces. Place two of the outer pocket pieces wrong sides together. Ensure one has interfacing and one doesn’t. Although we are using interfacing rather than fleece, follow the same procedure for quilting as we did on the larger outer pieces. Repeat for the back outer pocket.
Step 5:
To hide the top raw edges of the outer pocket use your two 11”x2.5” strips to make your own binding. To start fold and iron each strip in half. Keeping the binding folded, line up the raw edges with the raw edges at the top front of the pocket. Sew together using a 1/4” seam. Fold the folded edge of the binding over to the wrong side of the pocket, pin along the top and either hand or machine stitch in place.
Step 6:
To make the handles take the two 30”x3” strips of fabric and iron in half. Fold each raw edge of the strip into the centre fold and iron again. Top stitch along both long edges of each handle. Attach the handles to each of the main outer pieces by sewing in place from the base of the outer piece up to about 1.5” from the top about 2 inches in from the side edge. Make sure you don’t twist the handle as you sew each one in place.
Step 7:
Baste the two outer pockets in place on top of the outer bag pieces. Tuck the handles inside the outer pockets to keep them out of the way when you put the bag together. In the bottom corners only of both outer pieces and both lining pieces cut out a 1.5” square. This is in preparation for making the flat bottom to the bag.
Don’t forget to join us on our new Facebook page – we’re dedicated to share more education and inspiration with our customers…and we want you to be a part of our journey. Share your makes we’d love to see them! If you’d like to join our Make of the Month competition where you could win £20 in Threaders vouchers each month join our secret sewing group now! We’d love to see you in there!