How to make a layered scene card
- Read time: 3 minutes
- Written by: Crafters
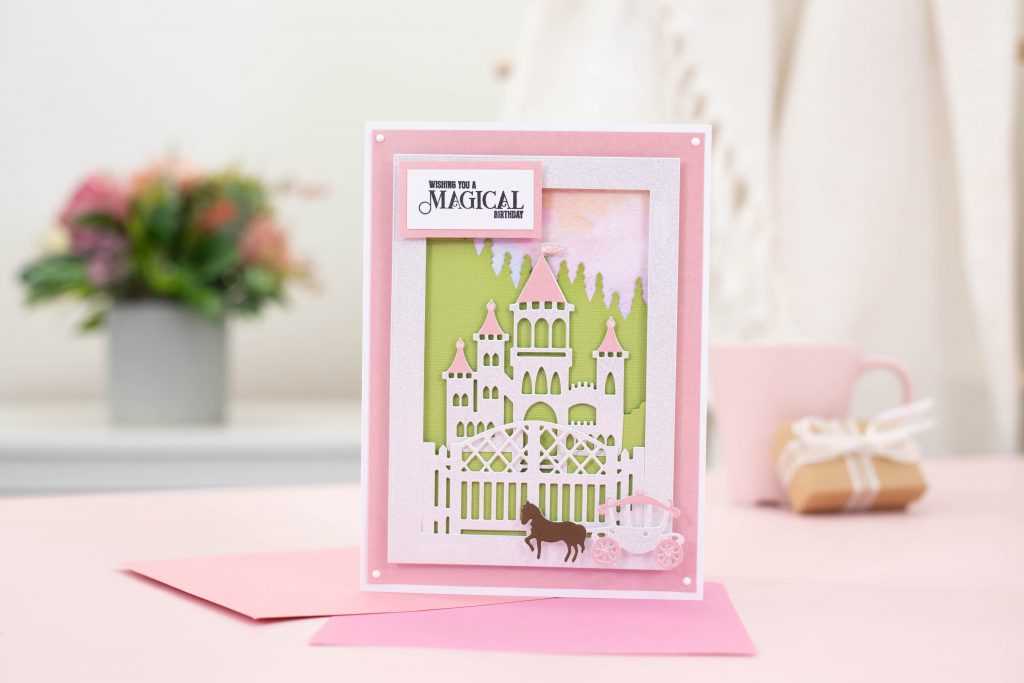
A layered scene is a great way to give your handmade cards an extra touch of dimension. And it doesn’t need to be difficult to create! Find out how to craft a layered scene card with our simple step-by-step guide.
We’ve used the Gemini Zig Zag Scene Builder Stamp & Die sets for our fairytale card. Each set in this innovative papercraft collection includes three dies to create a staggered scene that zig-zags up your card base. Or you can use each element separately to layer up a customised card.
You will need:
- Gemini Zig Zag Scene Dies – Once Upon a Time
- Gemini Zig Zag Scene Dies – Our Hometown
- Gemini 5″ x 7″ Mat and Layer Dies
- Crafter’s Companion Everyday Scenes 8″ x 8″ Paper Pad
- Centura Pearl Hint of Silver Card
- Multi-purpose Card
- Crafter’s Companion 12″ x 12″ Textured Card – Pastels
- Crafter’s Companion Luxury Mixed Card – Neutrals
- Pink Pearl Card
- Spectrum Noir Finesse Waterproof Inkpad – Noir Black
- Spectrum Noir Harmony Water Reactive Inkpad – Grasshopper
- Glitter Glue
- Self-adhesive pearls
- Collall All-Purpose Glue
- Collall Tacky Glue
- Foam tape pads (2mm and 3mm)
- Gemini Die Cutting Machine
Step-by-step instructions:
- Cut a piece of Multi Purpose card to 7 1/2″ x 11″. Score at 5 1/2″ to form a card base.
- Cut a piece of Pink Pearl Card to measure 5 1/4″ x 7 1/4″, layer onto the card base.
- Take the gate design from the Our Hometown set and die cut using Hint of Silver card. Snip into the scene to remove the gate from the surrounding cardstock.
- Die cut the tree scene from the Once Upon a Time set using green card and use your Grasshopper pad to ink the edges of the tree line.

- Take the castle design from the Once Upon a Time set and die cut three times. Once from brown card, once in Hint of Silver and once in pink pearl card.
- Repeat with the carriage die from the Once Upon a Time Set.
- Layer up the die-cuts for each design as shown.

- Cut a piece of patterned paper to 4″ x 6″.
- Take your die-cut tree scene and glue to the patterned piece.
- Use foam pads to layer the castle on top.
- Attach the die-cut gate at the bottom of the scene using foam pads.

- Cut a frame from Multi Purpose card measuring 5″ x 7″ on the outer edge. Use foam tape to attach over your layered scene.
- Attach the carriage die-cut onto the bottom of the frame using foam pads.
- Choose a sentiment from one of your Zig Zag Scene Builder Stamp & Die Sets. Use your alcohol proof inkpad to stamp onto a piece of Multi Purpose Card and cut top measure 3/4″ x 2″.
- Cut a piece of pink pearl card to measure 1″ x 2 1/4″, attach your stamped piece on top. Use foam pads to arrange your sentiment piece onto your layered scene.
- Decorate with glitter glue highlights and adhesive pearls for an elegant finishing touch!

We can’t wait to see your finished makes! So, don’t forget to show us your card creations on Facebook UK, Facebook USA, Twitter, Instagram UK, Instagram US, Pinterest UK or Pinterest US using the hashtag #crafterscompanion