The Beginner's Guide to Embossing
- Read time: 5 minutes
- Written by: Crafters
Are you ready to step into the next dimension of crafting? Are you looking for a way to make your crafting creations literally stand out from the crowd? If so, this Beginnner's Guide to Embossing is for you!
The art of creating a raised design on papercraft projects, embossing is a fantastically versatile technique, and it’s one of the easiest to master! So, whether you’re a total beginner, or just fancy picking up a few handy hints and tips, read on for everything you need to know about the art of embossing!

What is Embossing?
Embossing is a craft technique that allows you to create a raised design or pattern on your paper or cardstock - it’s such a great way to add beautiful depth and dimension to your projects! And the best part? It’s actually pretty simple to master the basics, then you can get busy adding colour and gilding to help your embossed designs shine even brighter!
Read on to find out how to emboss your way to success!
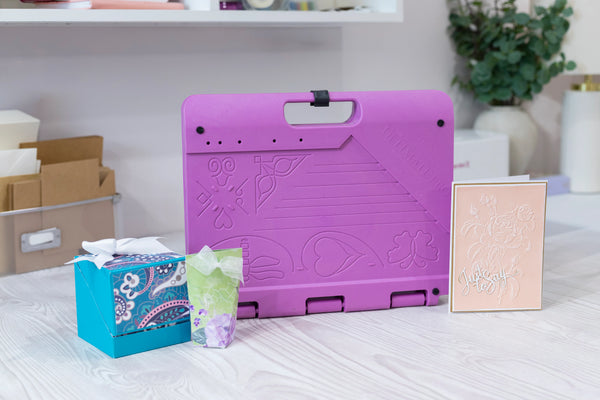
What tools do I need?
All it takes is an embossing folder and a die-cutting and embossing machine! When it comes to embossing folders, there are so many different designs, images and effects available - from florals and geometric patterns to festive designs and wreaths, there’s an embossing folder for just about every occasion!
Crafter’s Companion has three types of embossing folders to choose from, each has been specifically designed to create a slightly different effect. Let’s take a look!
- 2D Embossing Folders: These folders have one layer of depth - making them perfect for creating a raised image background for your projects - whether it’s a card, scrapbook page or gift tag. The effects created with 2D Embossing Folders usually work best when layered underneath other elements to add a bit of extra texture and dimension
- 3D Embossing Folders: These folders have been designed with varying layers of dimension to create images and designs that pack more of a punch! These folders are best for creating individual elements that can be cut out and used as embellishments, but there are also designs to create beautiful backgrounds!
- Cut & Emboss Folders: These products are super clever as they will emboss your projects whilst simultaneously cutting out certain parts! So, you can create beautiful raised decorative details, plus die-cut elements making them perfect for frames and delicate embellishments!
- Metal Dies: You can also create embossed images using metal dies! All you need is a rubber embossing mat and you can create a raised impression of your die shape rather than cutting it out!

How to use embossing folders
It’s actually surprisingly easy to create a beautiful embossed effect! Just follow the step-by-step instructions and you’ll be turning every papercraft, card and scrapbooking project into an opportunity to emboss in no time!
- Choose your embossing folder and the card or paperstock you want to use
- Open up the folder and pop your card or paper inside
- Shut the folder and place it onto a cutting plate
- Create the correct plate combination according to the embossing folder you’re using (we’ve listed them below)
- Roll the whole thing through your die-cutting machine
- Open up your folder and marvel at the stunning embossed effect you’ve just created!

Plate Combinations for Embossing
For the best results every time, you’ll need to whip up the right combination of plates and shims to pass through your die-cutting and embossing machine.
2D Embossing Folders:
3D Embossing Folders:
Cut & Emboss Folders:
- Clear cutting plate
- Metal Cutting Plate
- Cut & Emboss Folder with card or paper inside
- Clear Cutting Plate
Embossing with metal dies:
- Clear Cutting Plate
- Rubber Embossing Mat
- Card or paper
- Metal die, with the cutting edge facing down
- Plastic Shim
- Clear Cutting Plate

Embellishing and decorating your embossed design
Now you have your piece of card or paperstock with a beautiful design, whether it’s bound for a card or scrapbook page background, or as a stunning centrepiece, there’s a whole host of techniques to add even more beauty!
- Add gilding wax to the raised areas by dabbing it on your finger and gently swiping it across- this creates a shimmering effect that makes the embossed effect really stand out!
- Grab a Spectrum Noir Inkpad and brush and pop some extra colour onto your raised design, this will really make your project pop, especially if your card or paperstock is a flat colour!
If this post has got you thinking about exploring the wonderful world of embossing, why not tune into the below episode of The Craft Class on Crafter’s TV to find out even more about this fantastic craft technique!
For a warm welcome to all sorts of craft techniques, join us for more episodes of The Craft Class on Crafter’s TV to unlock your creative potential!
We hope this post has helped you get started with embossing, we’d love to see your finished projects on social media. Share your photos with us on Facebook, Twitter or Instagram using the hashtag #crafterscompanion.