Tutorial: Make a poppy from satin ribbon
- Read time: 2 minutes
- Written by: admin
Sarah-Jayne recently made a gorgeous card with a handmade satin poppy on it, and has also done up a fabulous tutorial to so you can make one too!

To make the flower you will need:
2-3cm width Satin ribbon
Glue gun
Heat gun
Beads
Directions

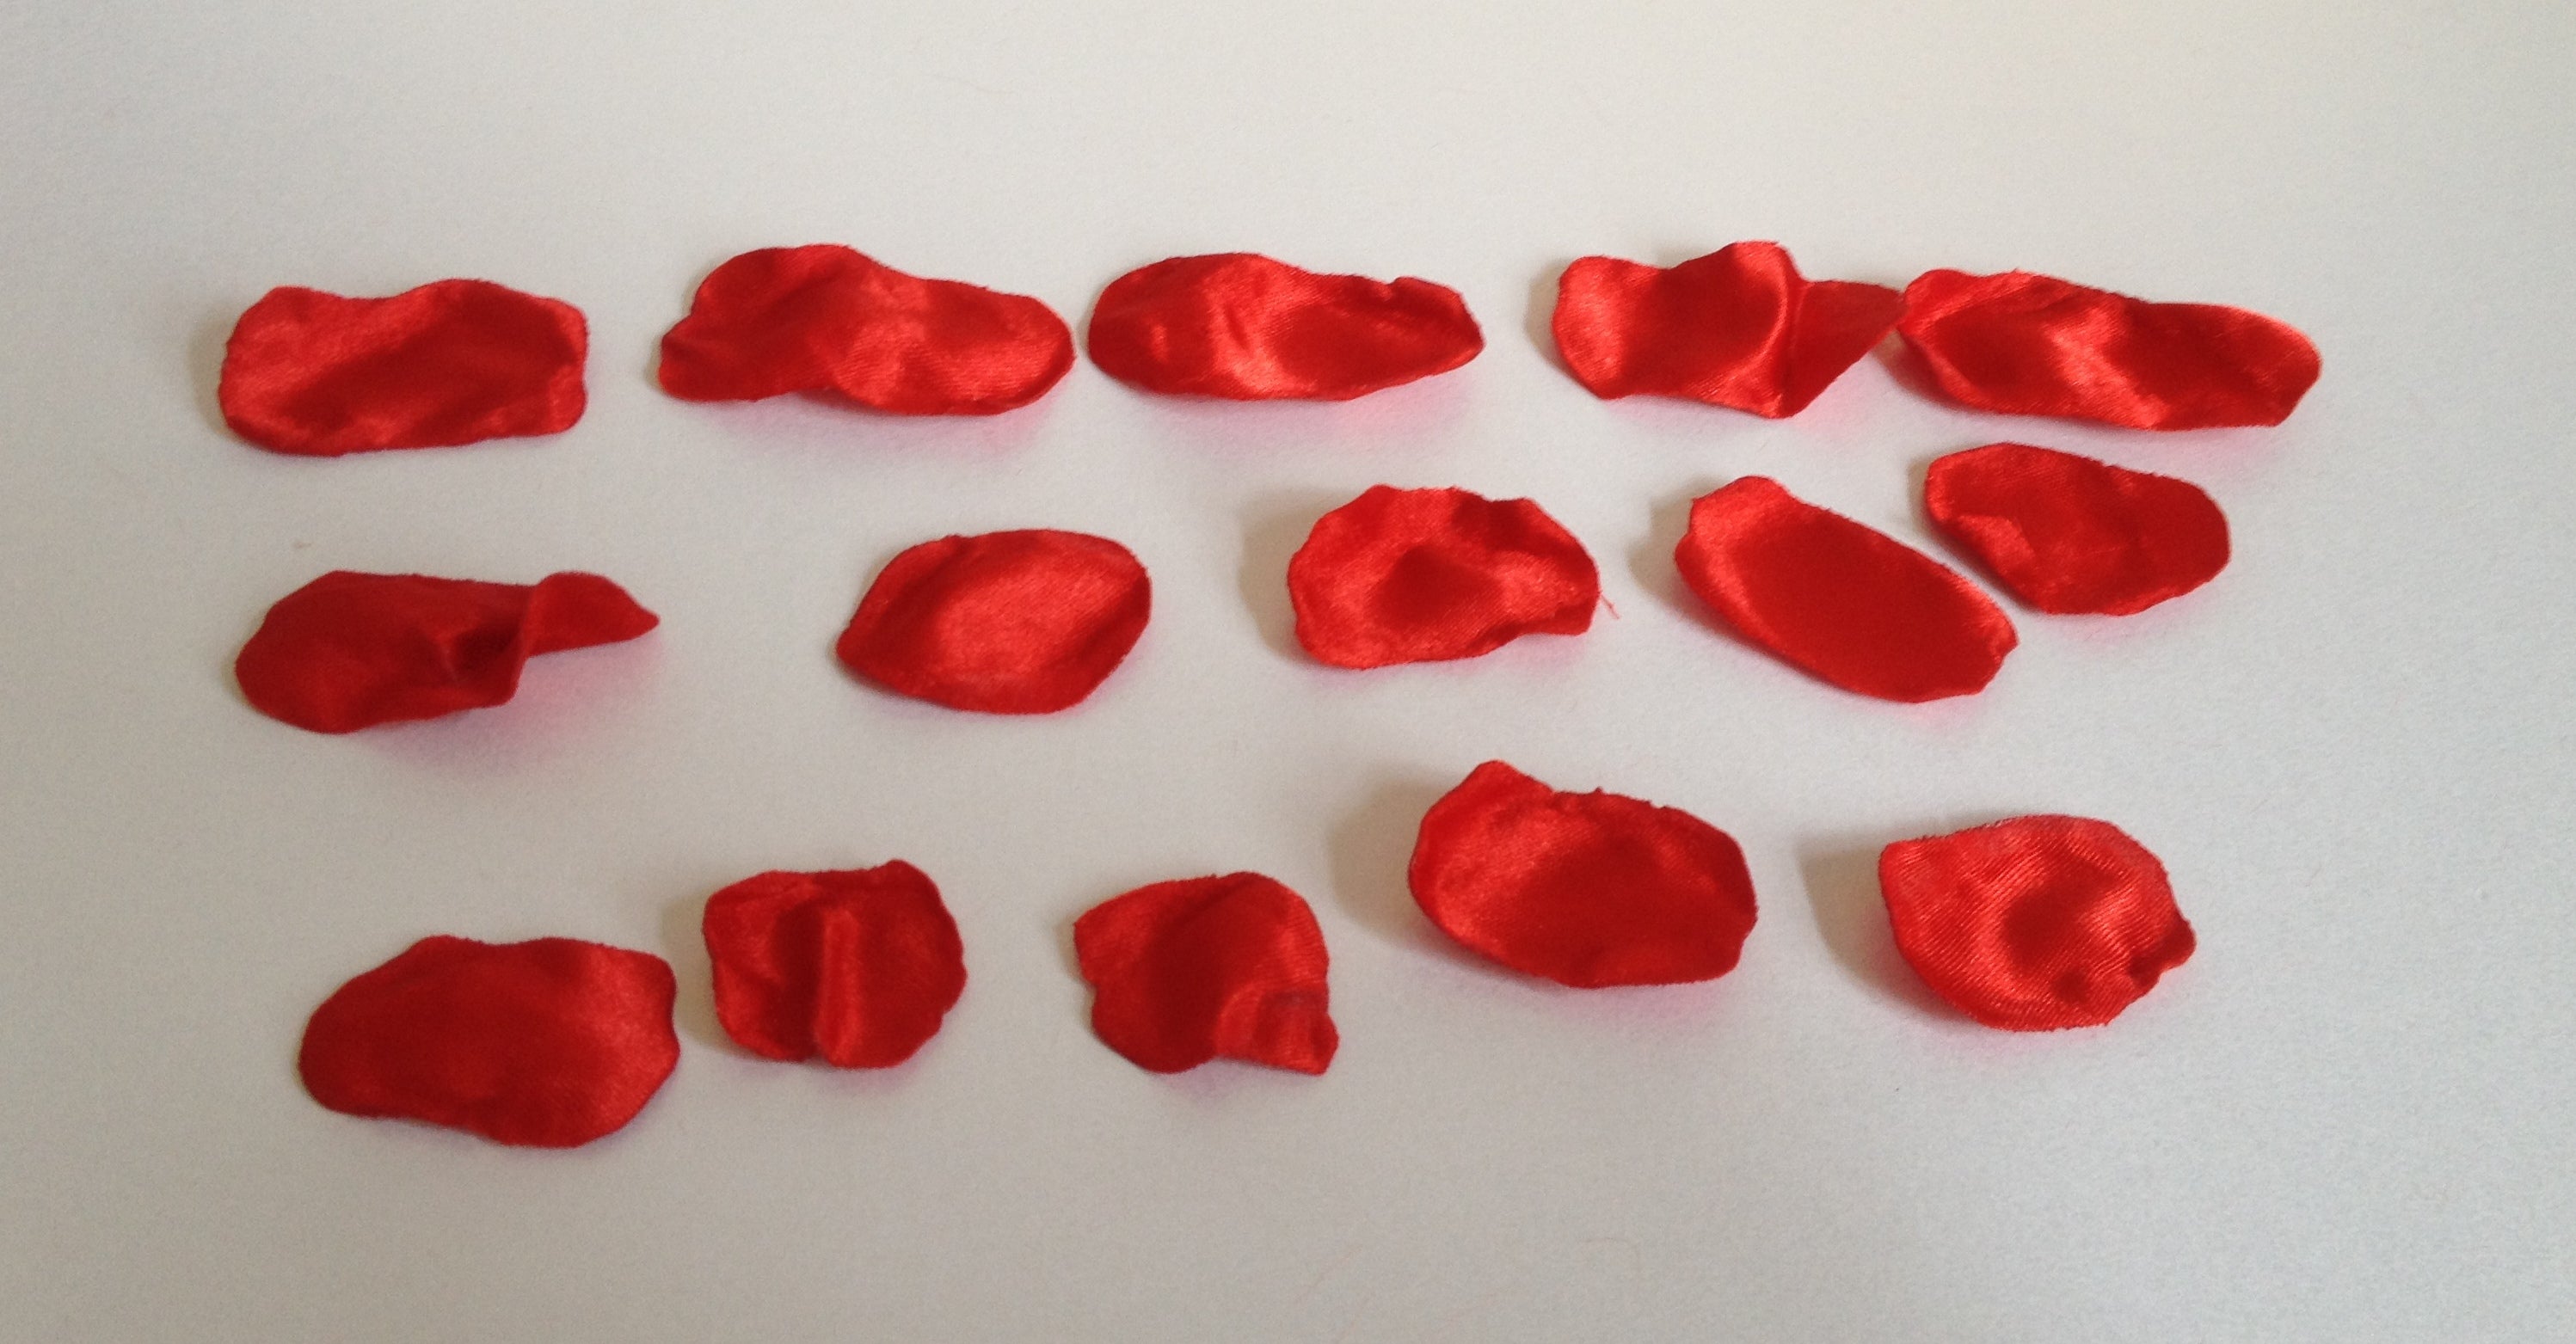
Step 1
Cut out 15 pieces of ribbon as cut various shapes as shown. No need to be exact as the petals will melt & twist into new shapes.

Step 2
Place your heat gun on a solid surface & holding one of your petals with tweezers place in front of the heat gun. The ribbon will start to seal the edges to stop fraying, will make the petal twist so don’t worry when it does it means your petal will be more realistic, the warmer your head gun gets the faster they will seal. Sometimes you will see them melt & turn black, I quite like the look, so again don’t panic.
Step 3
Repeat the process on all your petals

Step 4
I used a glue gun to stick all the petals together, starting with the smallest on the inside; I then added the medium sized ones outside & then the larger ones.

Step 5
Using the glue gun I added a layer of glue & placed 8 faceted stones inside, you could use seed beads.
To make the card, you will need thse Crafter’s Companion products:


You will also need:
Poppy you have made
Velvet Ribbon
Gems
Sentiment made in word
• To make the card I used an A4 sheet of Centura pearl to make a 6×6 card blank.
• I then used the script embossalicious folder to emboss another sheet of A4 Centura pearl & cut it down to 5 ¼ square and layered it on top of Red colorcore card cut to 5 ½ square & then Black colorcore card down to 5 ¾ square
• After layering all the pieces up I used red liner tape & added the ribbon to go on the front of the card and around to the back to hide the ends away.
• I then used Collall 3d gel to fix it to the card.
• Use Collall 3d gel to fix your ribbon flower onto the front of the card.
• Matt & Layer your sentiment & use Collall 3d gel to fix to your card.
• Then add your gems.