Tutorial – Using embossing powders to create an emboss resist for Spectrum Noir Sparkle pens.
- Read time: 4 minutes
- Written by: CraftersCompanion

Its so much fun to create depth and texture to your colouring project. Here embossing inks and powders have been used to create resist areas, adding interest and contrast. Laine has a fabulous step by step tutorial so that you can do this too, let’s begin!
Directions:

Step 1: Cut a square of watercolour card to the size that you require. Paint two layers of gesso over the front of your square, using a large paintbrush. This will provide a firmer surface for your embossing and stop the ink pigment being absorbed by the base card.


Step 2: Select the stamps you wish to create your emboss resist pattern. Here two Textures stamps have been used.
Step 3: The stamps are attached individually to the Rock-a-block stamp mount. Perfect Medium is applied to the stamp.

Step 4: Stamp the image onto watercolour card and cover with the clear embossing powder. Apply your heat gun to set the embossing powder. You will see when the powder is set by the change in the powder colour.

Step 5: Apply Spectrum Noir Sparkle pen Moonstone directly from the pen onto the watercolour card. You can see where the heated embossing powders have added resist detail.

Step 6: Scrunch some kitchen roll/tissue and apply this to the wet ink pigment. This creates the swirl ‘cloud’ detail. The ink which has been removed from the colouring is now on the tissue swirl. The background topper for your image is complete.


Step 7: Apply the butterfly stamp to the Rock-a-block stamp pad, apply embossing ink of your choice and stamp butterfly on watercolour card.

Step 8: Cover the embossing ink with embossing powder. Here the Sea Foam powder has been used. Heat emboss your powder to set.

Step 10: Die cut your butterfly stamp using the matching ‘All of a Flutter’ die.

Step 11: Start to colour your butterfly image with Spectrum Noir Sparkle pen Moonstone. Pigment has been applied to a clear block and applied to sections of the image using the ‘Drybrush Technique’ and a small paintbrush. Drybrush is a painting technique using a relatively dry paintbrush to pick up your pigment. This is applied to dry paper or card and is a great technique for applying pigment to small areas of a colouring.

Step 12: Repeat the technique with Soft Jade, colouring panels and detail of your choice.

Step 13: Peacock Blue is applied and provides a light contrast between the panels of Soft Jade and Moonstone.

Step 14:Add brightness and further colour contrast with Moonlight pigment, applied using the some technique.

Step 15: The last colour to be added to the butterfly is Aquamarine. Your image is coloured in tonal shades, with the slight contrast of Moonlight pigment and will be well defined when added to your embossed topper panel.
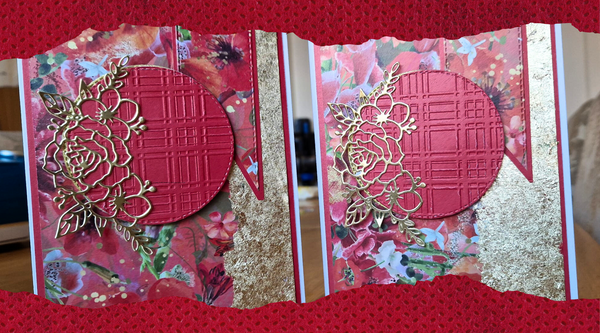
Step 16: Trim between the butterfly antennae and body. Curve the wing gently round the back of your scissors to create shape in the image. Glue your butterfly onto the painted/embossed background. Apply your topper to matting layer and onto the designer paper you have chosen for your card. Decorate your card as desired. Here the card is cut using the Create-a-Card base die – Nicole. A decorative edge has been added with the Floral Vine Edge die. Extra floral detail has been added using die cuts from Crafter’s Companion. These have been coloured through the die using Spectrum Noir Sparkle pens in the same shades as the butterfly stamp.

Step 17: A closer view of the coloured topper showing sparkle detail.
Crafter’s Companion Supplies:
Other Supplies: Ranger Perfect Medium Stamp Pad, Darice Embossing Powders – Clear Gloss, Sea Foam
We would love to see what you make! Share your projects and cards with us on our Facebook page, tag us Instagram (#crafterscompanion), on Pinterest (@CraftersCompUK) or on Twitter (@CraftersCompUK)!