
How to use the Shaker Card Stamp and Dies
- Read time: 4 minutes
- Written by: Crafter's Companion
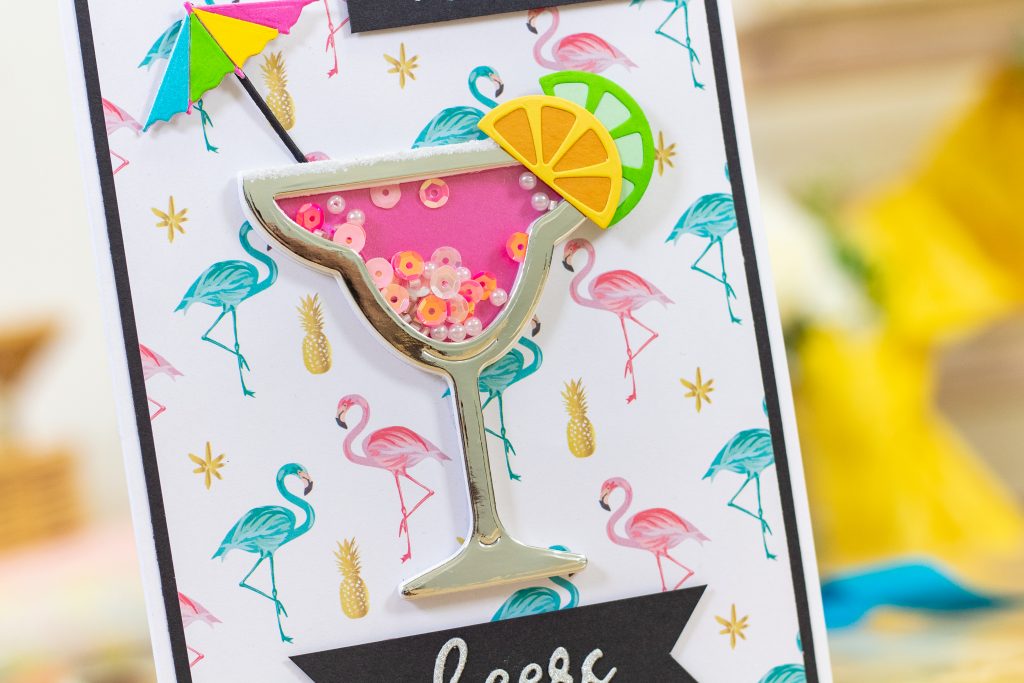
Shaker cards add so much fun to a cardmaking project. Your recipients eyes will light up when they see the extra beads, sequins or glitter inside the funky shape on the front, and have so much fun shaking it around. While it can be quite fiddly to make a shaker card from scratch, our amazing Shaker Card Stamp and Dies make it much easier, so in this post, we’re going to tell you how to use them in order to make your own shaker cards!

There are six different Shaker Card Stamp and Die sets to choose from, including a fun Prosecco bottle, a balloon and a scrumptious cupcake, so no matter what occasion you’re crafting for, there will be a design to suit. You could even try mixing and matching them for double the shaker card fun!
You will need:
- Your favourite Shaker Card Stamp and Die set
- A piece of A4 card in your favourite colour or finish
- Low Tack Tape
- Gemini Die-Cutting Machine
- Two cutting plates
- Plastic shim
- Magnetic shim
- Acetate
- Red liner tape
- Foam On A Roll or adhesive foam sheets
- Sequins, glitter or beads
Step 1
Place the large outside die from your chosen Shaker Card Stamp and Die set on to your chosen cardstock. You can use Low Tack Tape to fix it in place. Place the card with the die on top of a cutting plate. Sandwich a plastic shim, followed by a magnetic shim and another cutting plate on top, then roll the whole thing through your die-cutting machine. This will give you the shaker base.
Step 2
To make the shaker border, place the large outside die from the Shaker Card Stamp and Die set on to your cardstock, and line the inner die up in the centre. Use Low Tack Tape to fix them both in place. Use the same Gemini sandwich combination to roll the whole thing through your die-cutting machine. This will give you the shaker card outline.
Step 3
Place the large outside die on to your acetate and adhere it in place with the Low Tack Tape. Again, use the same sandwich combination and roll this through your die-cutting machine. This will give you the three elements needed to layer up your shaker.
Step 4
Use strips of red liner tape to cover the edges on the back of the border die-cut piece. Peel the non-adhesive backing off and stick the acetate shape on top, making sure you line it up as accurately as possible.
Step 5
For the foam edges, there are two options. Either:
– Use the outer and inner dies to create a die-cut border shape from adhesive foam sheets. Just Low Tack Tape them in place and roll them through the die-cutting machine. Stick this to the back of the shaker border.
– Cut tiny pieces of Foam On A Roll to coat every edge of the back of the shaker border (it is essential that there are no gaps)
Step 6
Once you have added the foam, place your shaker upside down with the foam facing up. Add your sequins, glitter or beads inside, then carefully peel the backing off your foam and stick the shaker base on top, carefully lining it up. Flip the shaker over and you should be able to see and shake the contents of your shaker!
This will leave you with a completed shaker that you can use on the front of your cards! If you need a little bit more of a visual aid, take a look at the video below from Craig Laird. He does a brilliant demonstration with two Shaker Card Stamp and Die sets with great explanations, including one that is embedded into the card, so it’s definitely worth a watch.
Once you’ve become a bit more confident with your Shaker Card Stamp and Dies, you can create incredible projects like these!


These are some of our favourite stamp and die sets, so we love seeing all your photos of your creations! If you make any cards (or any other sort of project) with these sets, then
please tag us in your photos on Facebook, Twitter or Instagram using the hashtag #crafterscompanion.


