How to use the Gemini Decorative Outline Stamp and Dies
- Read time: 4 minutes
- Written by: Crafters
Minimalism is all the rage and if you want to be a part of it, you’re going to love the Gemini Decorative Outline Stamp and Dies! Designed to give you the most beautiful stained glass effect outlines, these are sets that are elegant and super versatile.
But how exactly do they work? At a glance, you may feel like there’s a lot of work involved with achieving a gorgeous look, but these stamp and die sets are actually very simple to use! Take a read through this post to find out more about them and how to incorporate them into your papercraft projects.

What are the Decorative Outline Stamp and Dies?
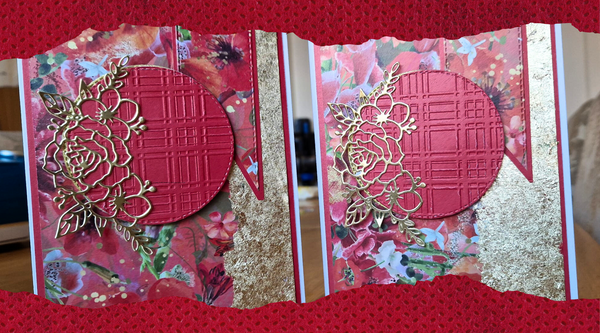
The main element of these sets is the Decorative Outline Die. Each has been designed to cut a rectangle with beautiful elements bursting through the edges, as you can see in the image above. However, they’re slightly different from our usual dies, as they only cut the outlines of all the elements, giving you negative spaces in between to fill with colour, acetate, vellum or something entirely different!
Alongside the incredible die, you’ll receive a selection of sentiment stamps that pair up with the theme of the set. With the addition of these stamps, you can create stunning card projects, scrapbook pages, gift boxes and so much more. They’re extremely versatile and so much fun to experiment with!
How do they work?
Alongside these stamp and die sets, we’re releasing Self Adhesive Sticker Sheets, which are absolutely ideal for pairing up with the dies. These sheets make adhering your outline die-cuts to your projects so much easier, so take a look at the following step-by-step to see how they all work together.
- Lay down your clear cutting plate and your chosen Self Adhesive Sticker Sheet with the colour side facing down.
- Place your favourite Decorative Outline Die with the cut side facing down on top of your sticker sheet.
- Add your plastic shim and magnetic shim on top of the die, then finish the sandwich with your clear cutting plate.
- Run this sandwich through your die-cutting machine.
- Once the die has cut, remove the plates, then remove the die from the Sticker Sheet.
- Use a Pokey Tool to push any remaining pieces from the negative spaces, then carefully peel the sticker away from the backing sheet and adhere it to your chosen surface, using tweezers or the Pokey Tool to adjust.
This method also works if you’re using the die with card. Just swap the Self Adhesive Sticker Sheet for your favourite shade or finish of card, and cut away! You can use foam pads, a tape pen or all purpose glue to adhere it to your chosen surface, then go crazy with adding your colour.

How can you add colour?
Adding extra colour to the outline images is quite possibly one of the best parts of the whole process, so you should enjoy experimenting and discovering all the different ways that you can bring the designs to life.
Try using the AquaTint Liquid Inks to create fun watercolour effects. The Sparkle Inks would be so beautiful too, and will add a touch of glitz to the stained glass look.
Add coloured vellum behind the die-cut to create a tealight decoration for your home or go one further with a sheet or patterned acetate. This would look so stunning and unique!
If you want to create a fun scrapbook effect, you can use the die to cut into a variety of coloured card and one outline, then use the negatives to fill the spaces within the outline. This will create such a fun effect!

We’re so excited to see how you put your Decorative Outline Stamp and Dies to good use so make sure you share your photos with us on Facebook UK, Facebook USA, Twitter, Instagram UK, Instagram US, Pinterest UK or Pinterest US using the hashtag #crafterscompanion,