How to make paper flowers
- Read time: 5 minutes
- Written by: Crafters
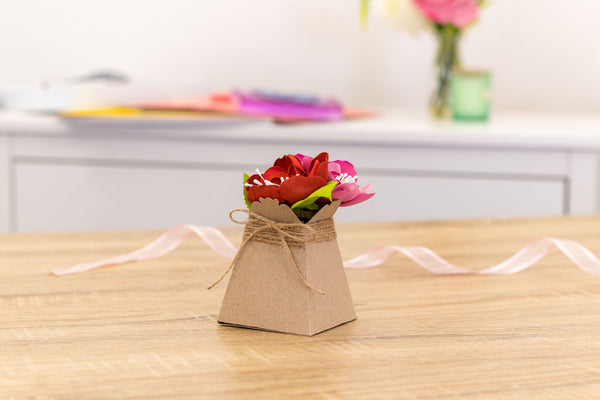
Make special occasions, celebrations, birthdays and just because moments extra special with a bouquet of handmade paper flowers. Learn to craft paper flowers with our simply step-by-step guide. Follow the photo guide to fold, stick and arrange your own posy of paper flowers that will last forever!
We’ve used the Crafter’s Companion Floribunda Paper Pad which blooms with botanical illustrations and atmospheric colour washes in rich and sumptous shades. Each sheet of this high quality paper is double sided, so your paper flowers will look beautiful from every angle.

You will need:
- Crafter’s Companion Floribunda Pad
- Crafter’s Companion Simply Said Vellum Pad
- White Multipurpose Card
- Brads
- Gilding Flakes
- Floristry Wire
- Guillotine
- Bone Folder
- Strong Adhesive
- Hot Glue Gun
- Crafter’s Companion Extra Strong Permanent Glue Tape Pen
- Scissors
Step-by-step instructions:
How to make paper flowers step by step

- First, cut five 6 x 6” Square sheets of paper from the Floribunda Paper Pad.

2. Take one of the sheets of 6” paper and lay it on your table in diamond rotation. (We are using white paper here to demonstrate.)

3. Next, fold across from corner to corner to create a triangle.

4. Take one of the bottom corners and fold up towards the top point of the triangle.

5. Repeat this on the opposite side to create a diamond shape.

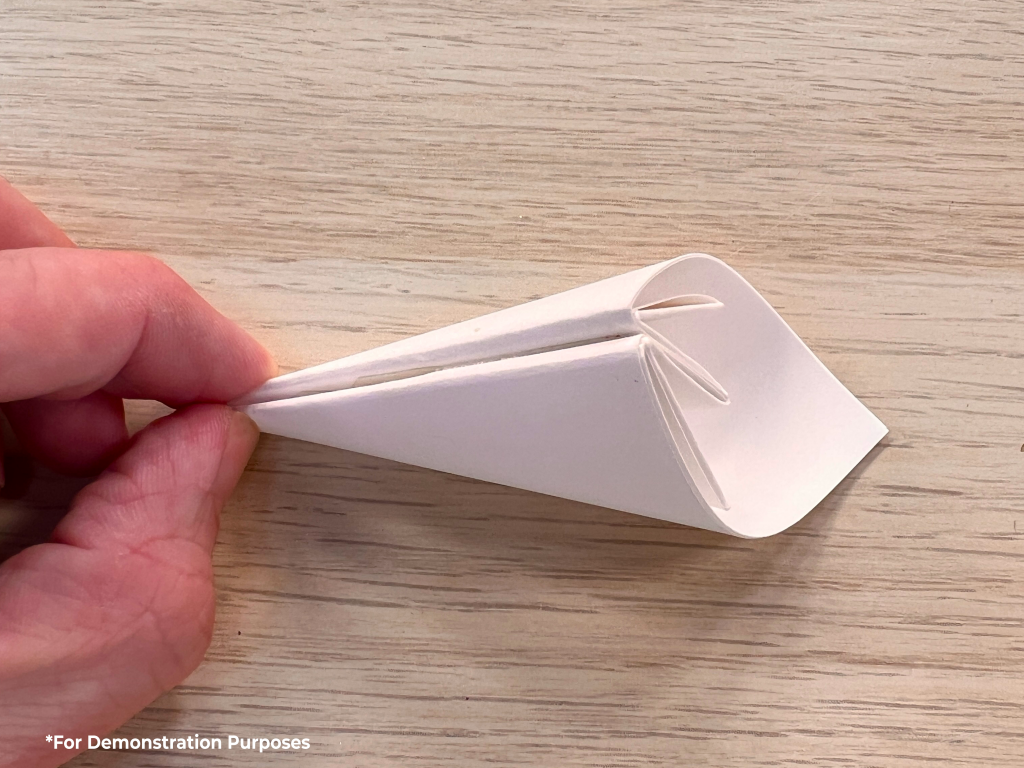
6. Now, pick up one of the newly folded sides, open it out and and flatten it down as shown.

7. Repeat this step on the opposite side.

8. Next, fold over the top portion of the new side to keep it in line with the top fold of your paper piece as shown.

9. Pick up the fold from step eight, fold it back on itself and tuck in behind to create an open pyramid shape as shown.

10. Repeat the last two steps on the opposite side.

11. Then, fold the outer edges in as shown.

12. Add a strong adhesive to one of the sides.
13. Now, fold your shape together to secure in place with the glue. This is your first petal!

14. Repeat this process with the other four pieces of 6″ x 6″ paper.

15. Use a hot glue gun to attach a piece of floristry wire to the centre of one of the petals.

16. Attach all five petals together with a hot glue gun to create a flower shape.

17. Turn your flower shape upside down and use a hot glue gun to secure the floristry wire in place.

18. Finally, add a small amount of glue to the centre of your flower shape. Attach a brad to the glue as a central decoration.
How to make a vase for your paper flowers
- First, cut a piece of card to 3.5″ x 8.25″.
- From the bottom right corner draw a 3″ square.
- Then, across the top edge from the right-hand side make a mark 1″ from the right.
- Next, draw a line from that mark to the top right of the square.
- Then across the top edge from the right-hand side make a mark 2 inch from the right.
- Next, draw a line from that mark to the top left of the square.
- From the line you have just drawn add a ½” gluing tab to the side.


8. Follow the lines to cut out the panel.
9. Then, repeat the process to draw and cut out another three panels.

10. Score and burnish the gluing flaps and the base panels

11. Next, add adhesive to the glue flaps and attach the four panels together.

12. Now, attach the final two sides together to create the main body of the vase

13. Fold in the four base panels and stick in place so they are secure.
12. Next, cut out four pieces of patterned paper so they measure 1/4″ smaller than the four panels of the vase.
13. Use adhesive to attach the patterned paper to each panel of the vase to decorate.
14. Now, choose a message from the Simply Said Vellum Pad. Use scissors to cut to size.
15. Next, add a shimmering border to your vellum sentiment using gilding flakes.
16. Attach your sentiment panel to the front of the vase.
17. Finally, take your paper flowers and arrange in the vase to finish.
Now you’ve mastered the technique you can craft paper flowers for any season, occasion or recipient. Just choose coloured or patterned paper to make flowers to match your theme! Check out the huge selection of patterned paper, textured, pearl and coloured card on offer from Crafter’s Companion.
And, don’t forget, we love to see your finished makes! So, make sure to show us your finished creations on Facebook UK, Facebook USA, Twitter, Instagram UK, Instagram US, Pinterest UK or Pinterest US using the hashtag #crafterscompanion