How to use Layering Stamps
- Read time: 6 minutes
- Written by: Crafter's Companion
Layering Stamps are the perfect thing to use if you want to build up gorgeous backgrounds or incredible detailed images, but they can be a little bit confusing and fiddly to use. It can often be difficult to line your layers up properly or get an even spread of ink, which results in you having re-line up the stamp again! Luckily, we’ve got this handy ‘how to’ with lots of hints and tips to help you get the most out of our Layering Stamps!

The basics
We’ve got a brilliant selection of Layering Stamps available, including Background Layering, Photopolymer Floral Stamps and our Crafter’s Companion Layering Image Stamps. Each has their own purpose and can achieve a certain look on your papercraft projects.
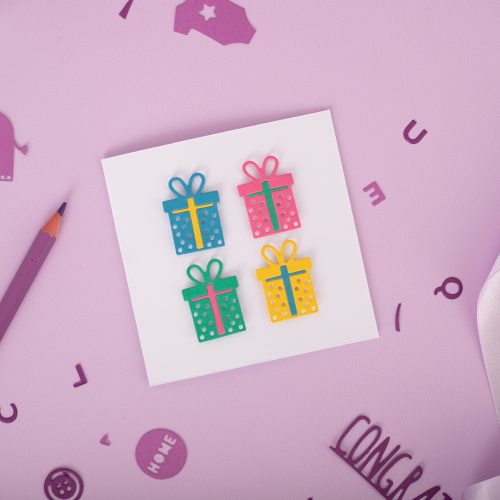
Every set of Layering Stamps comes with a selection of stamps. In the Background Layering, it’s three, and in the Image Stamps, it’s a fairly large number, however, for the layering elements, we number a squared off corner on each individual stamp in the order that they need to be stamped in. For example, the Magical Unicorn set features four main image stamps and each have been numbered from one to four. Simply stamp number one first, followed by two on top and so on.
By following these numbers, you can build up a detailed look, but of course, rules were made to be broken, so you can also try switching the numbers up and only using some of the layers for a more abstract effect.

Which inkpads work best?
For layering up your stamps, we recommend using the Harmony Quick-Dry Dye Inkpads by Spectrum Noir. What makes these inkpads unique is their super-fast drying time. Within seconds of applying the ink to your chosen material, it begins to dry, which makes these inkpads perfect for creating a layered stamp effect.
Even though these inks dry quickly once applied, they really don’t skip out on the colour payoff. They each pack such a punch and leave an incredibly vivid image behind. There are also 36 colours to choose from, each with two complementary shades to help you achieve highlights and shadows with ease.
You can see these inkpads in action with the Background Layering Stamps in this Watch Along Wednesday. Just take a look at how incredible the vibrant yellows are!

How do you apply the stamps?
For the ultimate precision and minimal mistakes, we recommend that you pair any Layering Stamps up with a Stamping Platform. This tool allows you to accurately line stamps up and press them down into your paper or card with an even amount of pressure, ensuring a great spread of ink. They work best alongside a cutting mat for even more accuracy.
- Line your card or paper up in a spot that you’ll easily remember on your cutting mat. If you’re not using a cutting mat, just lay your card or paper on to your surface.
- Turn your Stamping Platform upside down so that the legs are sticking up in the air. Apply the first Layering Stamp on to the grid, using the squared off corner to fit against a line. Again, make sure this is a spot that you will remember, so perhaps use one of the corners of the platform or the dead centre.
- Coat your stamp with ink (it doesn’t matter if you get some ink on to the platform – it can easily wipe away).
- Flip the Stamping Platform over and line it up with your paper. If you want it slightly off-centred, you can use the grid on the cutting mat to find a point that works best. Once you’re lined up, press the platform down firmly into the paper or card, pushing against each area of the stamp to ensure an even spread.
- Release the platform and you should be left with a brilliant impression. To remove the stamp, simply turn the platform over, wipe the stamp and platform to remove any ink, then peel the stamp away.
- Continue this method with each numbered stamp until you have built up the image!
For more of a visual reference, take a look at the video from Leann Chivers below. In this video, she demonstrates the Background Layering Stamps and the amazing looks that they can create.
What about Layering Stamp and Dies?
We absolutely love a good Stamp and Die set here, so of course, we had to create dies to match up with our Image Layering Stamps and dies for the Photopolymer Floral Stamps. These involve an extra step in the process, but it’s a fairly simple one that will result in highly detailed, die-cut elements for any project!
Simply follow the steps above to create the layered image to begin with. Then once it has dried, take the die and place it over the top, using a bit of Low Tack Tape to hold it in place. Sandwich this between a base cutting plate, a plastic shim, a magnetic shim and a top cutting plate, then roll this through your die-cutting machine. You can then remove the beautiful die-cut element and use it as you please!

We hope that this handy guide has helped you with understanding our Layering Stamps a little better and given you some inspiration! We’d love to see what you’ve been creating with yours, so please tag us in photos of your creations on Facebook, Twitter or Instagram using the hashtag #crafterscompanion.